Introduction
Image optimization can involve compression, resizing, choosing the right format (e.g., JPEG, PNG, WebP), and implementing techniques such as lazy loading.
All these measures contribute to creating a faster, more efficient, and more enjoyable website.
Although we are focusing on the WordPress platform here, these techniques can be applied to any website.
While optimization can be applied after upload using various plugins, it’s best to optimize images on your computer first.
Why optimize images for a website at all?
Optimizing images for a website has several important advantages:
Reducing server costs: Smaller images take up less server space and require fewer resources to serve, which can reduce costs, especially for high-traffic websites.
Faster page loading: Unoptimized images are often large, significantly slowing down website loading times. Faster loading improves user experience and helps with SEO ranking.
Reduced bandwidth usage: Optimized images consume less bandwidth, which benefits both site owners and visitors, especially those with limited data or slow internet connections.
Improved SEO results: Page speed is a factor that affects SEO. Faster pages are more likely to rank highly in search engines, which can increase visitor numbers.
Better user experience: Faster page loading, along with clearly displayed and properly sized images, contributes to a more pleasant user experience, which can increase user retention on the site.
Choosing the correct format
The first optimization we can easily apply is selecting the format in which to save the image.
Here is the size of an image saved in two different formats.
| FORMAT | SIZE |
|---|---|
| PNG | 170KB |
| JPG | 41.8KB |
So, for online publication, we recommend the JPG format.
Use PNG only if the image has transparency and another format cannot be used.
It should be noted that the PNG format can also have a certain degree of compression.
However, due to the nature of the format itself, significant savings in size are not possible.
Optimization using the TinyPng service
Additional optimization can be quickly and easily done using an online service called TinyPng.
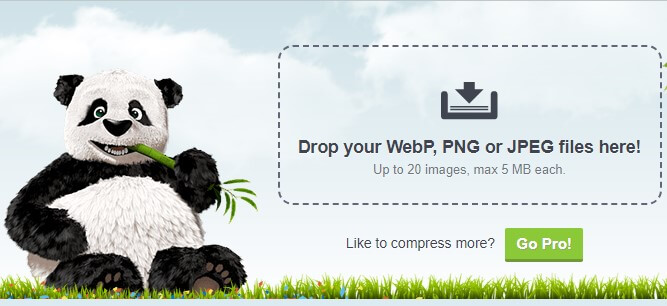
Simply drag and drop the image into the designated area, or upload it from your computer or mobile device by clicking on the space.
TinyPng removes some information from the image to reduce its size.
After TinyPng completes its job, it will show you how much the image has been optimized.

As you can see, the program does its job very well.
| Before | After | Savings |
|---|---|---|
| 170KB (PNG) | 94.5KB | -44% |
| 41.8KB(JPG) | 31.6KB | -24% |
You will notice little difference in quality between the original and the converted image, but it now takes up much less space.
Additional image optimization
Additional optimization can be done by converting to the WebP format, which will further reduce the file size of your image.
However, while this format is excellent for compression, you must check whether you can use it at all.
If you expect visitors to your website using older devices and browsers, they might not be able to view this format.
Online Convert
The first option is an online service called Online Convert.
Using it, you can convert not only to WebP but also between many other image formats.
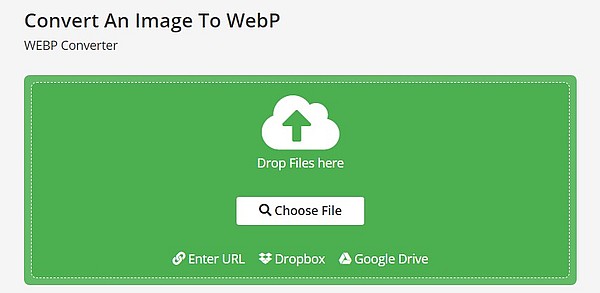
You can convert up to 20 images at a time using the free version.
The procedure is the same as with the previously described service, and the program will automatically download and save the converted image to your disk.
Conversion using IrfanView
The second conversion option is using the previously described IrfanView image viewer and editor.

Select the image and right-click to choose Open with > IrfanView.
Immediately save the image in a different format by selecting Save> (original folder) and choosing the WebP format.
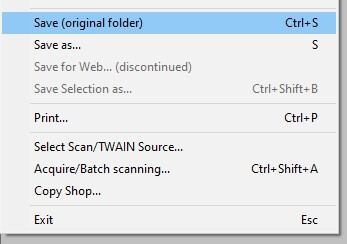
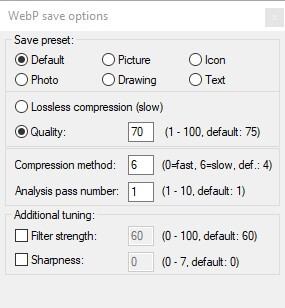
At the same time, the WebP format options will open, where you only need to ensure that the Quality option is set to about 75%, as this is the best balance between compression and quality.
You can experiment with this option to get the best quality and size on disk.
We have also created a table where you can see the savings you can expect.
| Without Optimization | TinyPng | Conversion to WebP |
|---|---|---|
| 170KB (PNG) | 94.5KB | 20.9KB |
| 41.8KB(JPG) | 31.6KB | 19.2KB |
As we can see, the savings are significant, without noticeable quality changes in the images.
Reducing image resolution
What is resolution?
Image resolution refers to the level of detail an image can display and is usually measured in pixels.
It is commonly expressed as the number of pixels in the width and height of an image, for example, 1920×1080.
The higher the resolution, the more detailed and clear the image, as it has more pixels to display information.
When to reduce resolution?
For publishing on a website or webshop, it is advisable to reduce the resolution as much as possible.
Here are just some examples:
- You are writing a blog in WordPress and have defined the width of the blog page as 800 pixels.
The images you upload should not be wider than 800 pixels, as they will take up space without any visible difference in quality.
- You are uploading product images to your webshop.
We have found that images 500×500 pixels are sufficient to display the product well.
If you have good (and expensive) hosting, they can be larger, up to 1000×1000 pixels, but consider if the product has multiple different images.
Resizing using IrfanView
Here we will convert images with more pixels to images with fewer pixels and lower resolution.
We will use IrfanView as before.
This is because, of all the programs we had on the computer, it worked quickly, and the saved images took up the least space.
Regardless of the image format we want to reduce, after loading, we must select Image > Resize/Resample or press Ctrl+R.
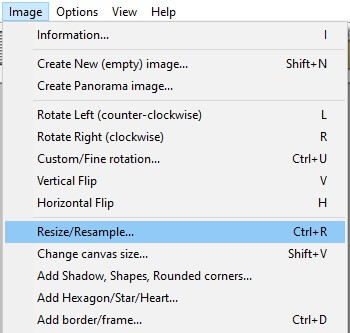
This will open a new panel with options.

On this panel, the Current size option will display the current height and width of the image.
The option that should be enabled is Preserve aspect ratio, which means that the program will maintain the width-to-height ratio during conversion.
Another option worth enabling is Adjust DPI.
Since we are reducing the image, the program will automatically reduce the number of dots per inch, making the converted image smaller on the disk.
Now enter the width of the future image under the Width option, and the program will automatically calculate the height.
Using the sharpen filter
If the image contains text, it may become poorly readable during conversion.
To prevent this, we must enable the Apply sharpen after Resample option.
This option will activate a filter that sharpens the image, so the text remains clear.
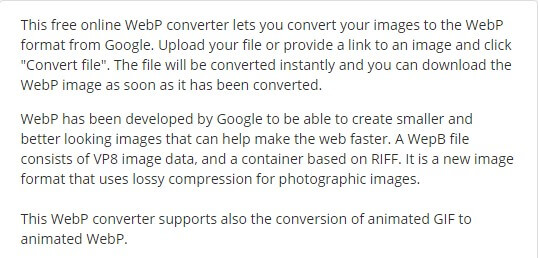
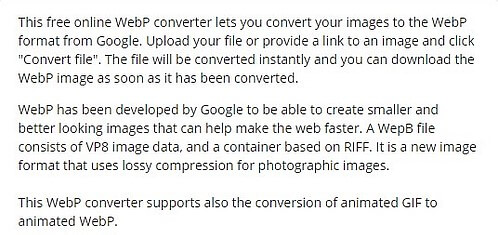
To see the difference, the image of the text below has the filter applied.
We leave it up to you to decide whether this filter is useful or not.
Batch image conversion
Yes, it is possible to edit multiple images at once (Batch conversion).
To do this, open the folder with the images for conversion, select one image, and right-click to choose “Open with IrfanView”.
When the program opens, press the “b” key.
This will take you to the screen for batch image conversion.
Select all the images you want to convert.
Do this by pressing the “CTRL” key + left mouse button.
By pressing the “Add” button, all selected images will appear on the bottom screen.
With the “Add all” button, you can select all the images in that folder.
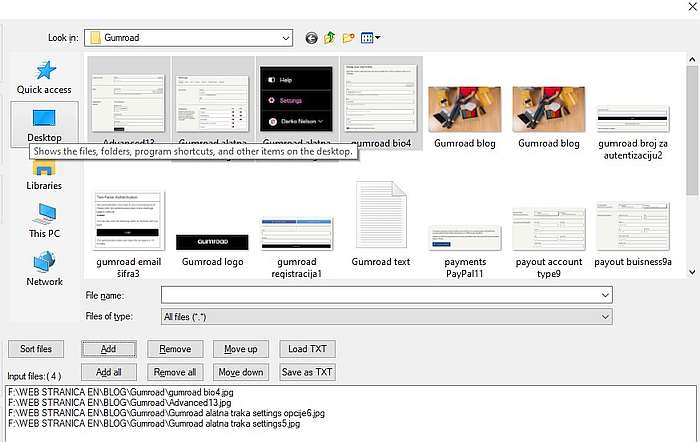
Now we need to specify what we want to do with the selected images.
Conversion options
Under conversion options, you can choose:
- Batch conversion
- Batch rename
- Simultaneous conversion and renaming
It is advisable to choose the third option if you are converting larger images to smaller ones in the same format so that the new images do not overwrite the originals.
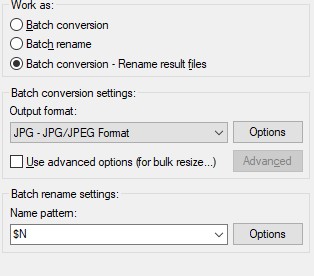
Under options (Options), select the format to which you want to convert.
For example, if the originals are in PNG format and you choose JPG here, all selected images will be converted to JPG.
Advanced options
In the previous image, there is an option you can enable: “Use advanced options for bulk resize”.
For example, you have images 1600×800 pixels.
In the advanced settings, you need to define how much you want to reduce the images.
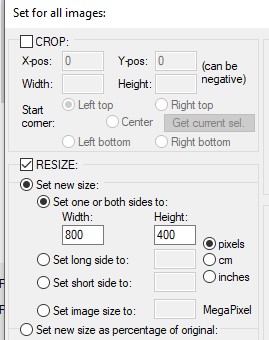
Here you must check “Resize” and specify the new width and height while maintaining the current aspect ratio.
If you set it to 800x400px, it means that the resolution of the changed images will be twice as small.
There are many other options here for you to experiment with.
Specifying the folder
We still need to specify the folder where we will save the converted images.
If we press the “Use current folder” button, the program will save the images in the same folder from which they were loaded.
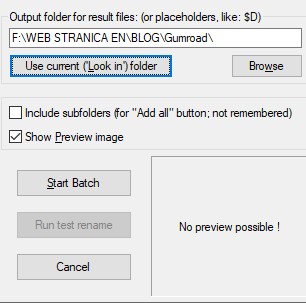
Of course, you can specify any other folder if you want.
By pressing “Start batch”, you can complete the job.
We suggest you do a few test conversions first to get the most out of this excellent program.
Image enlargement
Although images can be enlarged using the previous method, unfortunately, even with the use of various filters, the results were not good.
Also, over time, we tried many services on the Internet and got similar results.
We found a solution in Canva which has already been described several times on this blog.
In Canva, the image is uploaded using the Upload option, which is intended to allow the processing of some of your own images in addition to the offered ones.

The best results are achieved when we select a template that is the same or similar dimensions as the uploaded image.
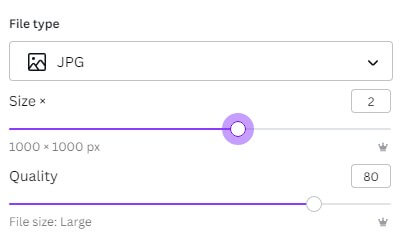
When saving the image, under the Size option, we can choose an enlargement of up to three times.
If the used image is of good quality, the result will be very good.
Frequently Asked Questions
Conclusion
If you publish your work on the internet, applying the methods described here will significantly speed up web page loading while maintaining high image quality.
Optimizing images on your computer before uploading can be extremely useful.
All original images will be saved for further editing.
Soon we will introduce plugins that you can use directly on your website to achieve the same goals.
Recommended Reading
Creating a free website on Google Sites
Blocksy the best free WordPress theme?
Spectra WordPress blocks: A new era of design
(Amended and supplemented on July 29, 2024.)

