
NELMEDIA
How to Open a Redbubble Store in 2026 (Step-by-Step Guide)
Learn how to set up your own store, upload your unique products, and start selling. Unleash your creativity and turn your passion into profit with our comprehensive guide.

Redbubble store: introduction
Are you looking to open your store on Redbubble and start selling your unique products?
Look no further! In this guide, we’ll walk you through the process of setting up your Redbubble store from scratch.
Whether you’re a complete beginner or already familiar with print on demand platforms, this step-by-step guide will help you get started on Redbubble.
Table of Contents
Preparing for Your Redbubble Store
Before you dive into creating your store, make sure you have the following ready:
1. High-Quality Images: You’ll need at least five high-resolution images (5000x5000px) in JPG or PNG format that you want to print on various products. Images should have around 300 DPI which is standard for printing.
2. Cover Image: Create a captivating cover image for your store, sized at 2400x600px, in JPEG or PNG format.
Now that your visuals are ready, let’s begin setting up your Redbubble store.
Registration
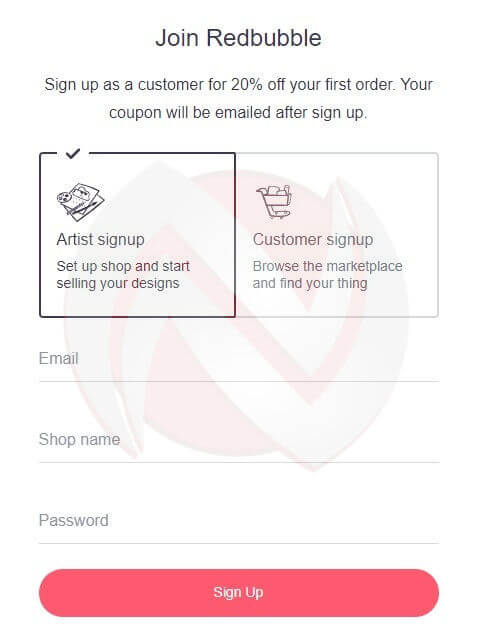
- Visit the Redbubble website and click on “Sign Up” in the main menu.
- Select “Artist signup” in the open panel.
- Enter your email address, choose a store name, and set a password.
- After filling in the details, click “Sign Up,” and your Redbubble store will be created. You’ll be directed to the “Sell your art” dashboard.
You can access Redbubble here.
Setting Up Your Store
Sell Your Art
In the “Sell your art” dashboard:

- Click on “Account Settings.”
- Fill in additional information related to your new account.
Dashboard
In the “Dashboard”:

Select “Get paid” and provide your personal details, including your name and email address.
Personal details

Confirm your email address by clicking “Resend confirmation” if you haven’t already.
Residential Adress
Under “Residential Address,” enter your street, city, postal code, province, and country.

Postal Address
For the “Postal Address,” input the delivery address.
You can add more than one address for shipping.

Taxes and Exemptions
If you’re a business owner, enter your tax number under “Taxes and Exemptions.”
Getting Paid
For receiving payments, you have the option to link your PayPal account.

Finally, verify your PayPal account and agree to let Redbubble represent you in case any of your products sell.
Set up shop
After confirming your email address, you’ll notice some changes in your workspace.
- Each time you log in, you’ll see three icons in the upper-right corner of the screen.
- Click on the first icon (account) and select “Dashboard” to return to your starting point.
- Choose “Set up shop” here to configure various aspects of your store.
Avatar
Under “Avatar,” upload an image, logo, or icon representing you. The best image format is 1:1 in JPG or PNG format.
Cover image

For the “Cover Image,” upload a 2400x600px image in JPEG or PNG format.
Make sure it’s creative and eye-catching as it will be the header of your store.
Profile
In the “Profile” section:
Confirm your name and email address, which you already provided.

Choose whether to display your full name or just your username on your store. (Display Name)
Allow users to see the information you want to share on your profile.
How to write a Redbubble shop bio?
When entering data into your Redbubble shop bio, keep it concise under 500 characters to ensure it displays fully on all devices, focusing on a hook about your art style, inspirations, and a call-to-action like “Follow for new designs!” to engage visitors.
Incorporate relevant keywords (e.g., “digital illustrator” or “fantasy motifs”) naturally for better SEO without stuffing.
Notifications
In the “Notifications” section, specify when you want Redbubble to email you about specific events.
For example, you can receive notifications when someone comments on your work.

Copyright
You can leave the “Copyright” option in its default settings.
Off-site marketing i Image settings
It’s advisable to keep the settings for “Off-site marketing” and “Image settings” at their default values.

After configuring these settings, save your changes.
Create products
Now, it’s time to define your products.
- Go to the Dashboard and select “Create products” and then “Add designs.”
- This will open the “Add new work” panel.
Add new work
In the “Add new work” panel, you have two options: create a new product or copy an existing one and make changes, like adjusting colors, to treat it as a new product.
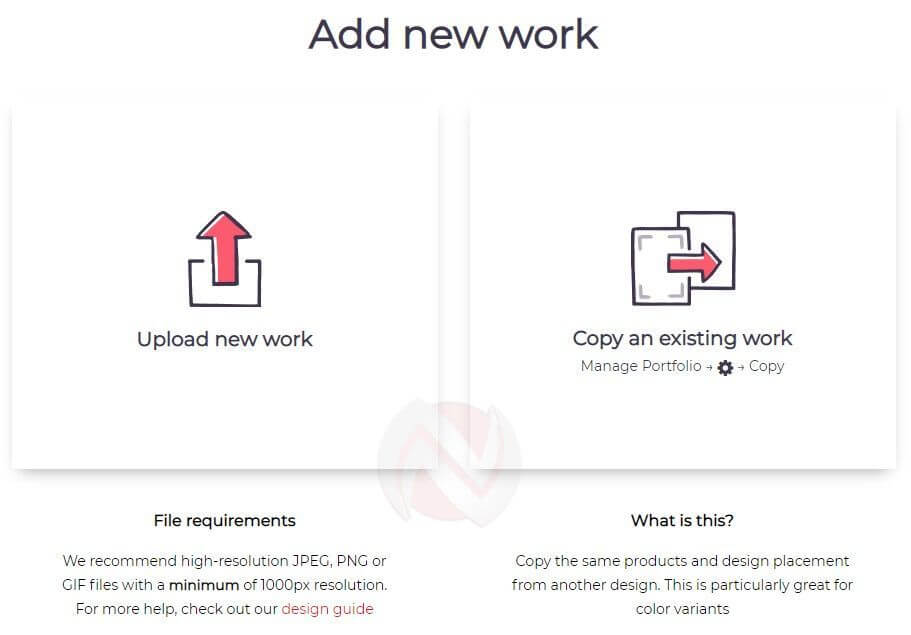
We will choose “Upload new work” since you’re creating a new product.
Here, you can upload images with a minimum resolution of 1000x1000px, but 5000x5000px or similar is preferable for flexibility.
Writing Product Descriptions
After uploading your image, it’s time to describe your future product:
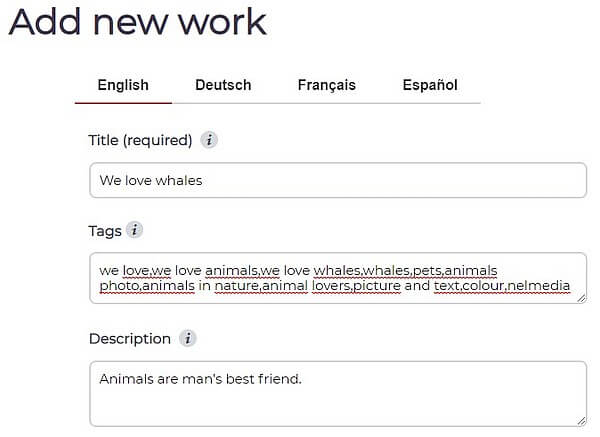
- Choose a title for your product.
- Add tags, which are words or phrases that help potential buyers find your products (separated by commas).
- Write a compelling product description to entice customers to make a purchase.
Adding Images to Products
Now, your product is taking shape.
Your uploaded image will be visible on a variety of different items.
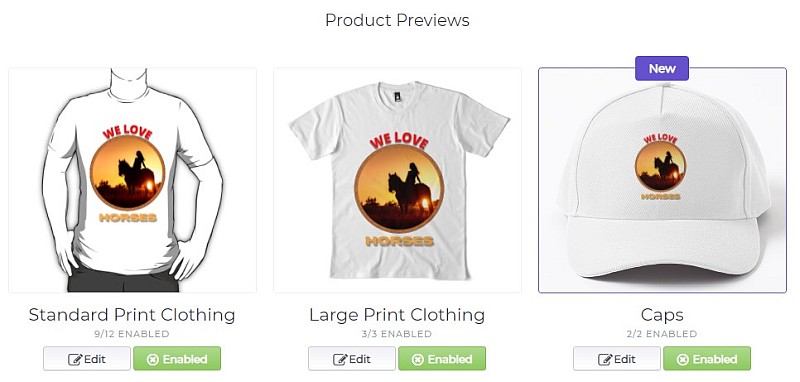
If the image doesn’t fit perfectly on a particular product due to its shape, you can simply disable that product by clicking the “Enabled” button.
A green button indicates the item is available for sale, while a gray button means it won’t be offered to customers.
Adjusting and Editing Images on Products
If your image goes beyond the edges of the product, you can use the “Edit” button to enter the image editor.

Inside the image editor:
- Use “Scale image” to adjust the size to fit.
- Ensure that the image stays within the light gray frame, as any parts outside won’t be visible.
- After resizing, center the image vertically and horizontally with the respective buttons.
- You can also choose a different background color using “Set background.”
- Once you’re satisfied with the changes, apply them by pressing the Apply Changes button.
Patterns
You may want to use the “Patterns” feature when your image resolution is around 1000 pixels and can’t be stretched to fit larger products.
Patterns distribute copies of your image across the product surface.

The “Front & Back” option will be available if the product has two surfaces, such as a book cover with both front and back sides.
In this case, the program will create only two patterns for the front and back.
Remember to customize the image size and alignment. Note that not all images will work on every product, so adjust accordingly.
For example, a wall clock will fit pictures in a circular format. Due to the circular cut in the middle and the offset letters, we were able to adapt the image for the wall clock.

In the event that the image on the item does not look good, we create a new image or exclude the item from sale.
Media and Finalizing Your Product
After defining all your products, go to “Media” to categorize your product and specify its visibility, and age-appropriateness, and confirm that you have all the necessary copyrights.

Click “Save work” to save your first product.
To have a complete store, you should aim to have at least five different products.
Setting Prices
Your artist margin is set by you and can be adjusted at any time from your dashboard.
Each item in your store comes with a predefined price, and you earn 20% of each sale.
If you wish to change your percentage, follow these steps:
- Go to “Account settings.”
- In the “Artists tools” menu, select “Product Pricing.”

In the table, you’ll see the pricing for all your products.
Adjust your earnings percentage under the “Markup” column.
Any changes apply only to that specific product, but you can also choose “Apply to all” to update the percentage for all your products.
Tips and Tricks
If you lack artistic skills or design expertise, don’t worry. You can hire an artist directly on the Redbubble platform.
Describe the image you have in mind, and they will bring your vision to life.
Of course, you’ll need to compensate the artist for their work.
Promoting Your Redbubble Store
Once your store is up and running, it’s essential to promote it to gain visibility and attract potential buyers. Here are some tips to help you get started:
- Share your store and products on social media platforms. This can help you reach a broader audience.
- Encourage friends and family to leave positive comments and reviews on your products. Positive feedback can boost your store’s credibility and appeal.
- Conduct some research to identify popular themes with limited competition. Create products related to these themes to capitalize on their demand.
- Create comprehensive and captivating product descriptions. An engaging title and detailed product description can increase your chances of making a sale.
- Initially, aim to offer a wide range of products in your store. A diverse catalog can attract a broader range of potential customers.
- Organize related products into collections to make it easier for customers to browse your offerings.
Monitoring Your Progress
Your newly created Redbubble store should become visible within 24 hours of creation.
However, significant traffic and sales may take some time to build up – it’s common for a more substantial following to develop over a month.
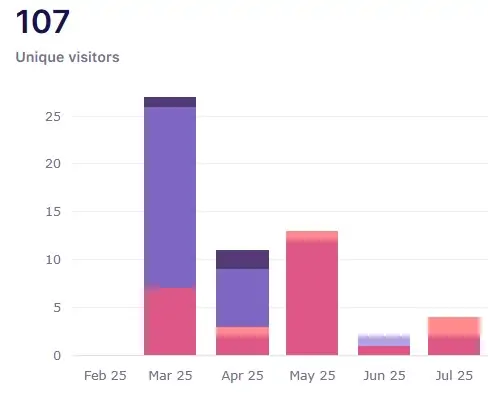
To keep track of your store’s performance, you can integrate Google Analytics, allowing you to monitor visitor numbers and the popularity of specific products.
Connected: How to set up Google Analytics
Redbubble Payment Methods and Payouts
Redbubble pays its sellers once a month, at the beginning of each month for the previous month’s sales. For example, earnings from January will be paid out at the start of February.
Before you can receive a payment, your account balance needs to reach the minimum payout threshold, which is $20, £20, or €20, depending on the currency you selected when setting up your account. If your earnings don’t reach that threshold in a given month, they simply carry over to the next month until the minimum is met.
Redbubble currently supports two payment methods: PayPal and direct bank transfer.
PayPal is available in most countries and is the faster and more convenient option for most sellers. Direct bank transfer is available in selected countries and may take a few additional business days to process.
FAQ
Conclusion
Opening a Redbubble storefront can be a rewarding venture for artists, designers, and creative individuals looking to share their work with a global audience.
By following this step-by-step guide and applying some essential marketing strategies, you can enhance your visibility, attract buyers, and start earning from your unique creations.
Remember that success on Redbubble often involves patience and consistent effort, so keep refining your store and products to maximize your sales potential.
Stay tuned as we will periodically share updates on our own store’s progress, and we invite you to share a link to your store for possible features on our “Contact” page.
Thank you for taking the first steps towards your Redbubble journey, and best of luck with your new online store!
Suggested reading
🔗 Printify Guide: Registration and Product Creation
🔗 How to Connect Printify to Etsy: A Complete Step-by-Step Guide
🔗 Kittl design: Inspiration and innovation in the world of graphics

Get the latest news!
Take a second, join our community, and discover the latest strategies and proven methods for earning extra income on the Internet.