What Is ClickASnap?
ClickASnap is one of the new services you may not have heard of yet.
You can publish your photos and images on it.
How does ClickASnap differ from others?
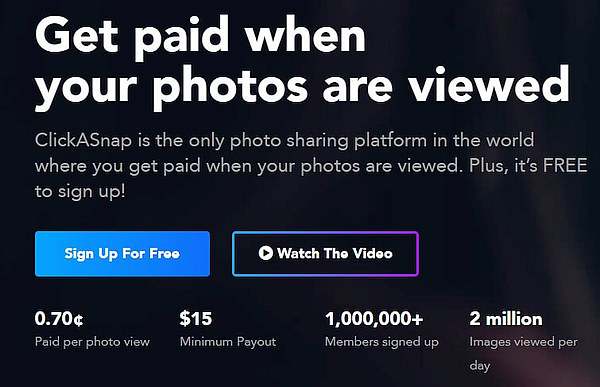
You can earn money on it even if someone views your photos.
There are many other options, but more will follow below.
The time needed to create a profile: 30 minutes
Costs: £2
Tools: Computer or mobile phone Internet access
Additional requirements:
PayPal account
Valid email address
ClickASnap Registration
In the beginning, there is the inevitable registration.
You need to enter your email address and enter the same password twice.
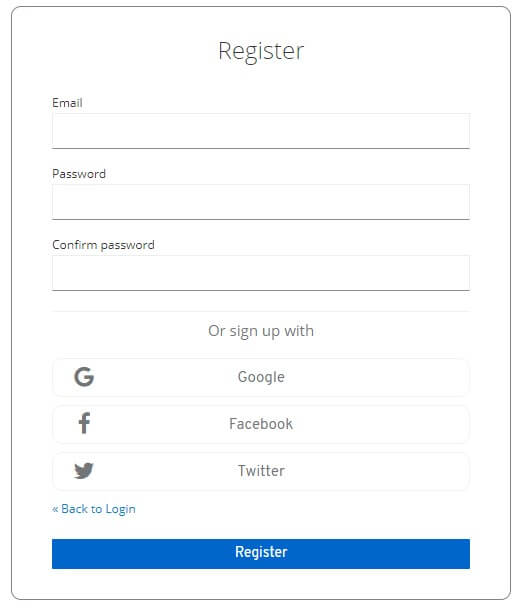
You can also log in through social networks like Facebook, Twitter, or your Google account.
Choosing Options
After logging in, a screen with options will open.
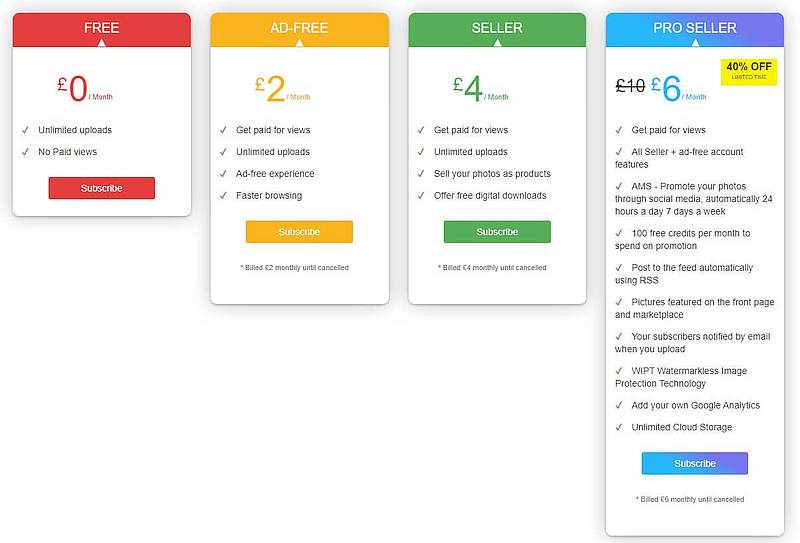
With the free option, you can create your profile and upload pictures with certain limitations, but you won’t be able to charge for them.
ClickASnap paid options
Under the Ad-Free option, which costs £2/month, you will be paid based on the number of views.
If you also want to sell your pictures, you need to choose the Seller option, which costs £4/month.
These costs are meager and are necessary for maintaining the service.
In the Pro Seller option, you will get advertising, more space, image protection with a watermark, and the ability to create finished products based on your pictures, which then costs £6/month.
Creating a Profile
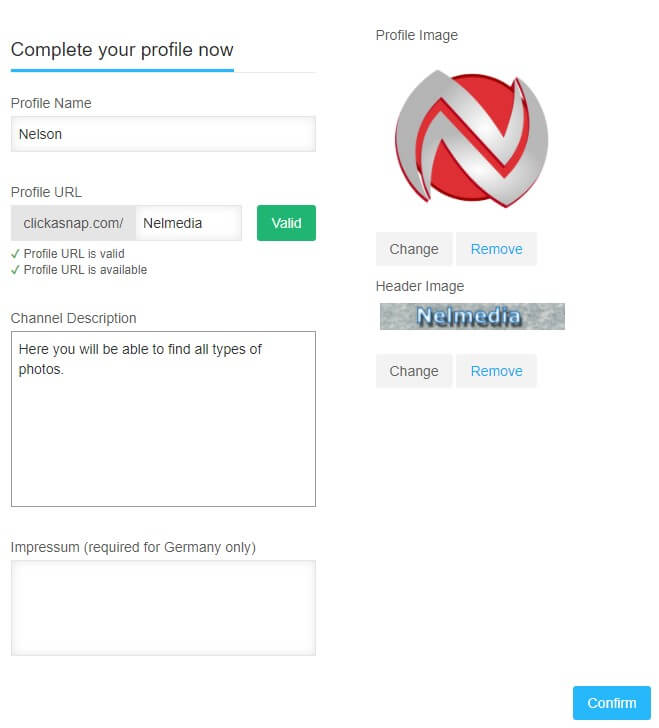
Creating a profile is simple and starts with giving your profile name.
It can be your name or your artistic name.
Profile URL
After that, you create a profile address (URL) that starts with clikasnap.com/
We inserted the name of our page (Nelmedia), so the address looked like this – clikasnap.com/Nelmedia.
This is the address you will invite people to if you want to show off your pictures.
Channel Description
Under Channel Description is a short description of your profile.
After that, you need to insert your profile picture and a header image that will be displayed above your profile.
The profile picture is 500×500 pixels, as on most services.
The header image should be 1107 x 339 pixels and is not a standard format.
In the profile settings, you can also add a link to your website (if you have one).
Confirmation of Email Address
After creating the profile, you will receive a message to confirm your email address.

I signed up through a Facebook profile.
If you’re signing up the traditional way, this step may be necessary before creating a profile.
Uploading Pictures
Uploading pictures to the platform starts by selecting “Upload a photo” in the upper right corner next to your profile picture.

On the panel that opens, you can select a picture from your folders or simply drag it into the designated window.
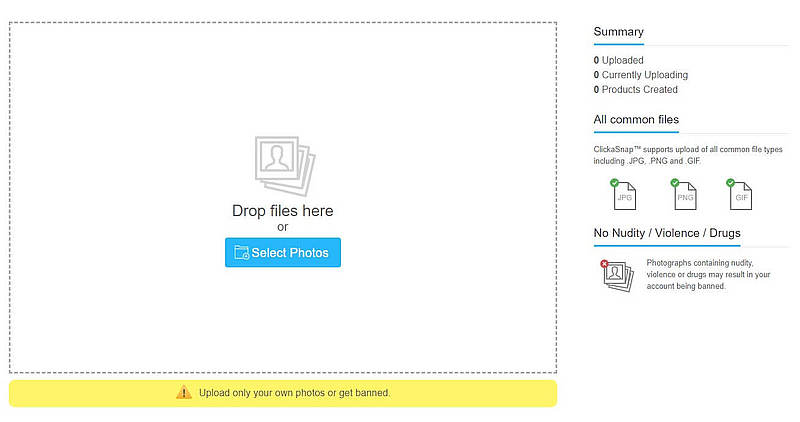
The platform supports pictures in JPG, PNG, or GIF format.
The pictures must be yours, or you will be excluded from the service.
Picture Description
When you’ve attached a picture, you need to provide some additional information.
The picture description is perhaps the most important part.
To make your picture available to a larger audience, you need to make sure to describe it in as much detail as possible.
Under Edit Details, you need to enter terms that will help future buyers find what suits them.
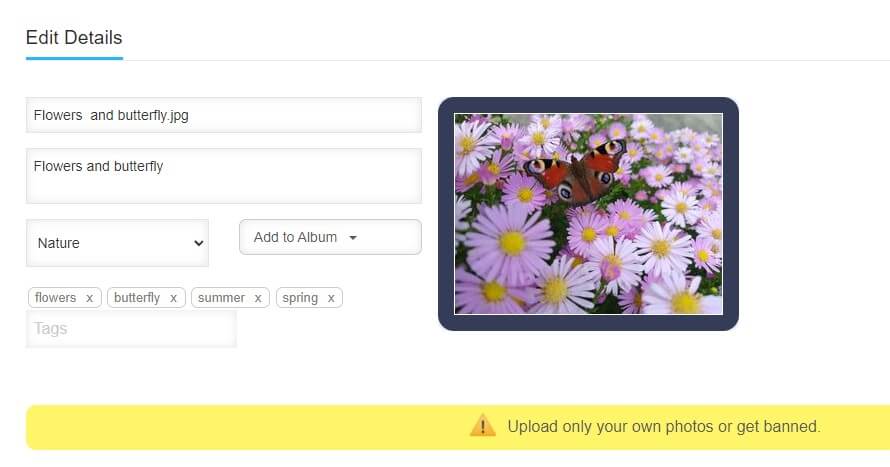
The program retains the name of the picture you entered, but you can change it.
After that, provide a brief description of what’s in the picture.
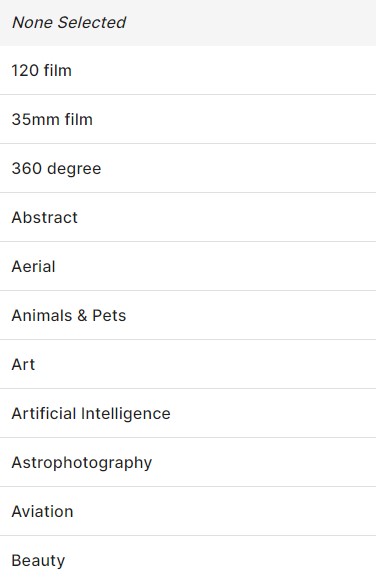
Under the category, choose one of the dozens of types available on the platform.
Use the “Add to album” option if you have multiple pictures that belong to the same category and you want to present them as a whole, like an album.
Tags are terms that describe the picture.
The more, the better.
But they must relate to what’s in your picture.
Congratulations, your profile will be finished with the first published picture!
Profile Options
If you forgot to enter something, you can always access your profile and make changes.
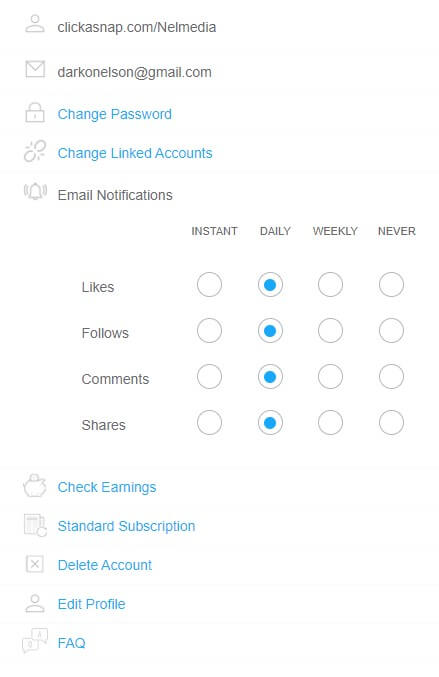
By clicking on your profile picture and selecting “Account Settings,” you can enable email notifications about visits to your profile and potential earnings.
Additional Options
Under the Analytics option, you can enter your Google Analytics number to track your profile’s traffic and picture sales (paid options only).

You will also be able to share your work on social networks.
I previously provided instructions on setting up Google Analytics. Please find them here.
Earnings and Payout
When someone views your picture or photograph in the free version, you will earn from 0.1 cents to 0.9 cents for the most expensive paid option.
You can withdraw the money to PayPal once you reach $15.
As you can see, due to the low cost of views, you need to aim for a higher number of views, which you can only achieve by continuously adding new pictures and combining them into albums.
Important Notes
This service is maintained by experienced programmers who already know all the ways someone can try to cheat.
From publishing free pictures as your own to paying certain services to artificially increase the number of visits.
Interestingly, it’s the people who tried to cheat who leave negative comments.
Suggested Reading
Although the ClickASnap platform can bring some earnings to everyone, if you’ve been involved in photography for a long time, you can earn more on the service we’ve already described:

