

If you have ever recorded audio clips, you have likely encountered the problem of unwanted noise in your material.
Fortunately, some tools can help you solve this problem, and one of the most popular and free programs for editing audio clips is Audacity.
Whether it’s noise in your podcast, interview, or music recording, it can be extremely annoying and can diminish the quality of your work.
Likewise, if you are involved in translation or transcription (converting audio recordings into text), you may have experienced situations where the audio recording has a lot of noise or the speakers in the recording are not clear.
What Is Audacity?
Audacity is a free and open-source program for editing audio recordings.
The program has been around for about 20 years and brings something new with each new version.
It offers a wide range of features that allow you to record, edit, and process sound.
One of Audacity’s most powerful features is noise removal from audio recordings.
In this guide, we will show you several examples of how to do this.
You can download the program here.
What Audio Formats Does Audacity Support?
Audacity supports a wide range of audio formats. Here is a list of some of the supported formats:
- WAV– Waveform Audio File Format
- AIFF – Audio Interchange File Format
- MP3 – MPEG Audio Layer III
- FLAC – Free Lossless Audio Codec
- OGG – Ogg Vorbis Audio
- WMA – Windows Media Audio
- AAC – Advanced Audio Coding
- AC3 – Audio Codec 3
- M4A – MPEG-4 Audio Layer
- AMR – Adaptive Multi-Rate Audio Codec
- AU – Audio File
- MP2 – MPEG-1 Audio Layer II
- M4R – MPEG-4 Ringtone Audio
- MPA – MPEG Audio Stream
- SND – Sound File
- AIFF-C – Audio Interchange File Format Compressed
As you can see, there is an extremely large number of different audio formats.
How to Remove Noise from an Audio Recording?
Loading an audio recording
Before we begin removing noise, we need to load the audio recording into Audacity.
Click on “File” in the menu and select “Import“.
Then find the file with your audio recording and click “Open“.

In that recording, select a part of the audio that contains only the noise and select it with the left mouse button.
It would then look like the image.
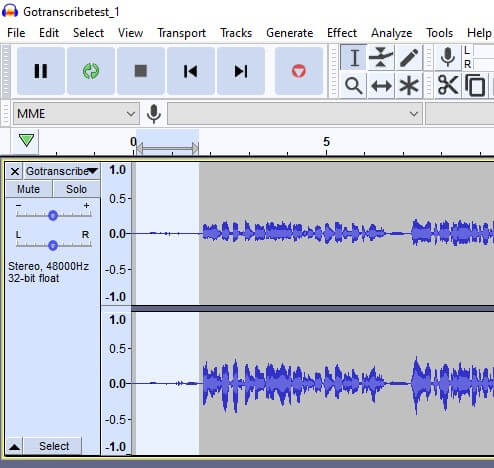
Selecting the desired part of the audio recording in Audacity you select only the part with noise, which will serve as a reference for noise removal.
Typically, you look for the part of the recording with the most noise.
We chose the beginning of the recording before playback started (you can see this graphically by the signal’s amplitude).
Applying the Noise Reduction Filter
After that, go to Effect > Noise Reduction and a window like the one in the image will appear.
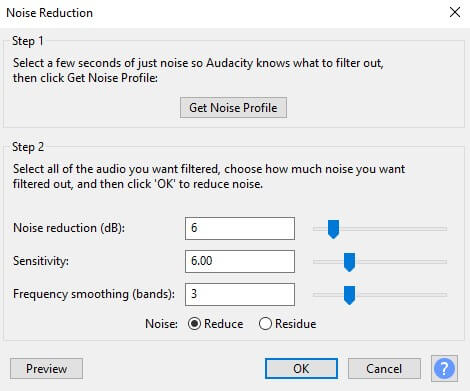
Here, set the Noise Reduction parameter to around 6-9 dB.
If you set this parameter to zero, it will indeed remove all noise, but it will also affect the quality of the audio recording, so we do not recommend that.
You can leave the other parameters at their default values.
By clicking on “Get Noise Profile,” you’ve inserted a sample that the program will use to remove noise.
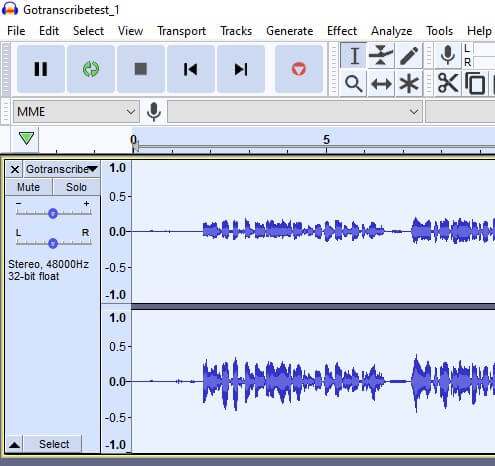
Now, from the main menu, select “Select > All” to select the entire recording and apply the “Effect > Repeat Noise Reduction” filter again.
Now the change will be visible and audible throughout the entire audio recording.
You can revert all settings to the beginning and repeat them until you are satisfied with the results.
How to Enhance a Part of an Audio Recording?
If, for example, in an audio recording, one of the speakers is hard to hear, you can correct this with another filter called Compressor.
Of course, you could also increase the volume of the recording with the Amplify filter, but this would amplify the already loud sounds, potentially causing distortion.
So, once again, select the entire audio recording and go to “Effect > Compressor” to open a new window.
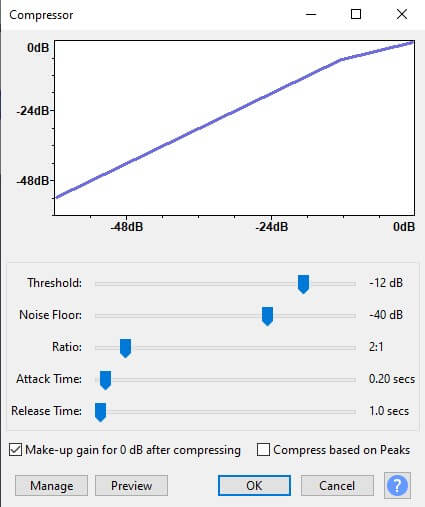
Here, there is no need for adjustments, and the results will be good with the default parameters.
If you are not satisfied with the results, you can try the “Compress based on Peaks” option.
When using this option based on peak values, upward compression is applied.
It makes the sound louder by amplifying louder sounds above the threshold.
The part of the audio recording that is below the threshold is amplified much less.
Saving the Edited Audio Recording
To save the recording, use “File > Export” and choose the format you want to save it in.
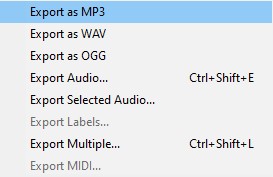
Audacity saving the audio recording If you don’t specify a format, the program will save the recording in the same format it was loaded in.
You can also save everything as a project using “File > Save Project.”
In this case, the program will save all the settings you used.
Frequently Asked Questions
Conclusion
As you can see, Audacity is an excellent program for sound processing.
There are many more possibilities that we have not been able to describe in this text.
If the existing options are not sufficient for you, you can install one of the many Audacity add-ons.
If you have any questions, please ask them in the comments.
Recommended for reading
✳️ GoTranscript: Registration and tests