

Gumroad is a powerful e-commerce platform that allows creators to sell products and services directly to their audience without needing to build or maintain an independent website.
Founded in 2011 by Sahil Lavingia and headquartered in San Francisco, California, it has become a go-to tool for thousands of digital entrepreneurs worldwide.
If you are looking for a straightforward way to monetize your skills, Gumroad provides an all-in-one solution that covers product hosting, payment processing, and digital delivery.
What Can You Sell on Gumroad?
The platform is incredibly versatile. You can sell almost any type of digital or physical product, including:
- Digital Downloads: E-books, PDF guides, notions templates, and presentations.
- Media Files: Digital art, photography, stock videos, music, and audio tracks.
- Software & Code: WordPress themes, plugins, and software scripts.
- Services: Consultation hours, coaching sessions, or freelance packages.

How to Set Up Your Gumroad Account (Step-by-Step)
Getting started on the platform takes less than five minutes. Follow this Gumroad tutorial for beginners to get your online storefront up and running.
Step 1: Registration
First, head over to the website and click on the sign-up button. You can easily register by entering your email address and creating a secure password.
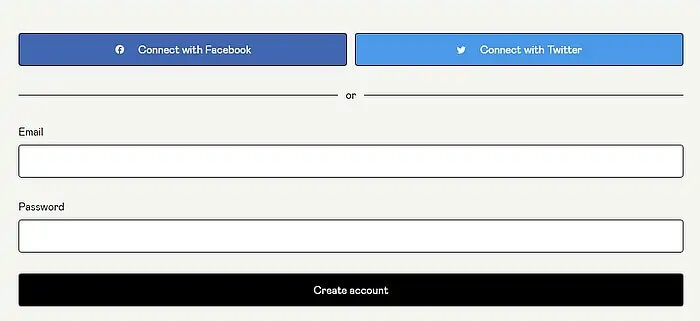
Alternatively, you can fast-track the creation process by linking your existing Facebook or Stripe/Google accounts.
To secure your account, Gumroad uses two-factor authentication (2FA). Once you submit your details, an authentication token will be sent to your email address.

Copy the code from your email, return to the login screen, and paste it into the verification box. Note that this verification number is only valid for 10 minutes.

Step 2: Entering Basic Profile Data
Once inside your dashboard, you will be prompted to set up your basic profile data. This starts with choosing your username.
Your username is highly important because it defines your custom URL store link. It will look like this: “yourusername.gumroad.com“.
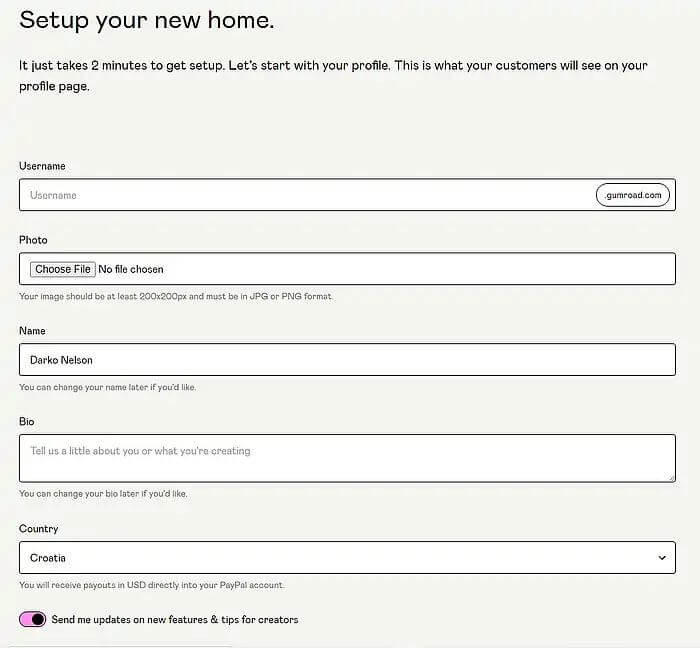
Make sure to upload a high-quality profile picture or logo (at least 200×200 pixels in JPG or PNG format).
Fill in your name, write a short, compelling biography that tells customers what you do, and select your home country.
Optimizing Your Gumroad Settings
Before you rush into creating your first product, it is wise to configure your operational settings. Navigate to the left-hand sidebar menu and click on Settings.
General Settings
In this tab, double-check your username and account email address. Under the Notifications section, make sure to enable event notifications.
This ensures that Gumroad will automatically notify you via email whenever you make a sale.
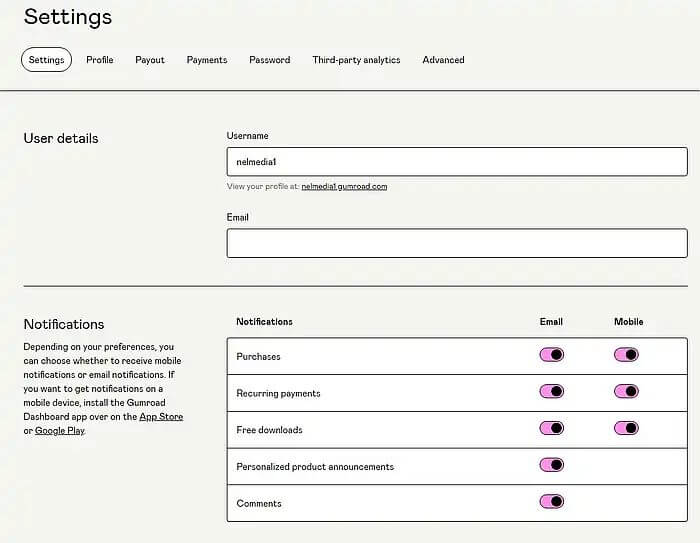
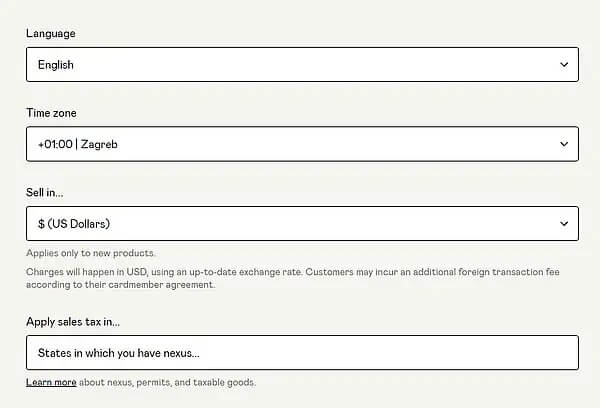
Further down, you can set your default store language, time zone, and base currency (US Dollars are highly recommended for the US market).
If you are a creator based in the US, you can also manage how state sales taxes are collected here.
Profile Customization
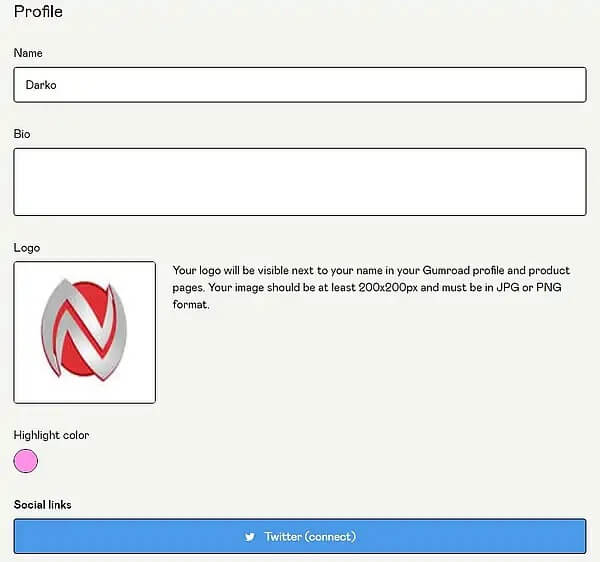
The Settings > Profile tab allows you to fine-tune how your store looks to external buyers.
Your previously entered name and bio will be here, but you can also choose to link your social media profiles, such as X (formerly Twitter) and Facebook, to display social proof on your store.
Setting Up Your Payouts (How to Get Paid)
To successfully withdraw your earnings, you must accurately fill out your payout profile under Settings > Payout.
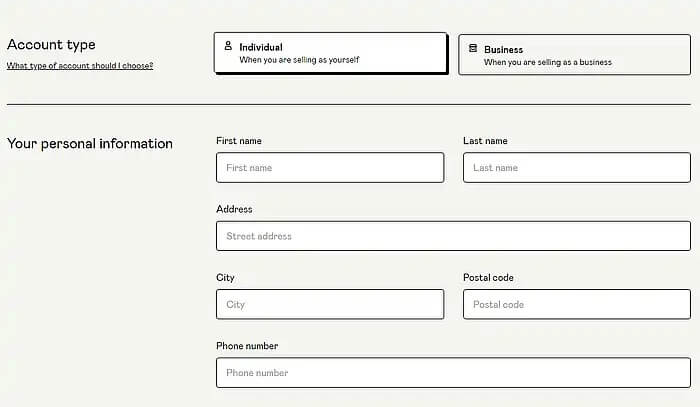
First, specify your Account Type. Choose whether you are operating as an Individual or a Business. For individuals, enter your legal first name, last name, physical address, city, and zip code.
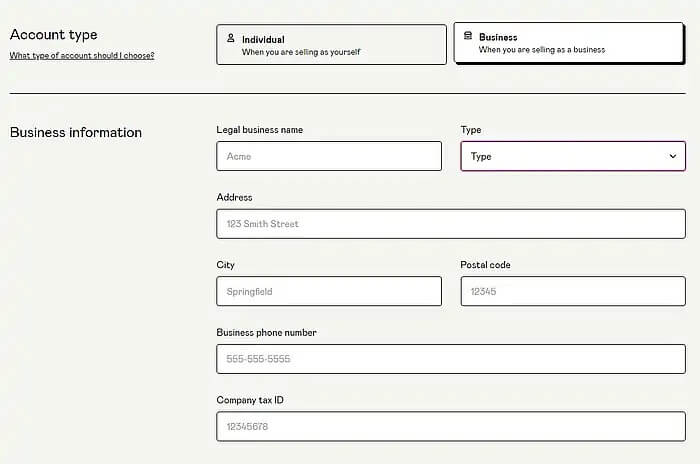
If you own a registered company, choose the Business option. You will be required to provide the same address fields alongside your official company tax identification number.
Note: For identity verification purposes, Gumroad will request your date of birth. This is standard financial security protocol used to verify your identity and protect your account from fraud.
Choosing Your Payout Method
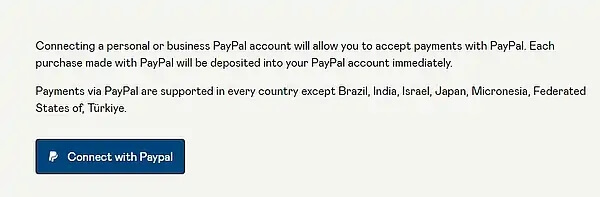
Gumroad supports direct bank transfers and PayPal payouts.
If you opt for direct deposit into your bank account, you must provide your bank’s routing and account numbers (or IBAN for international creators).
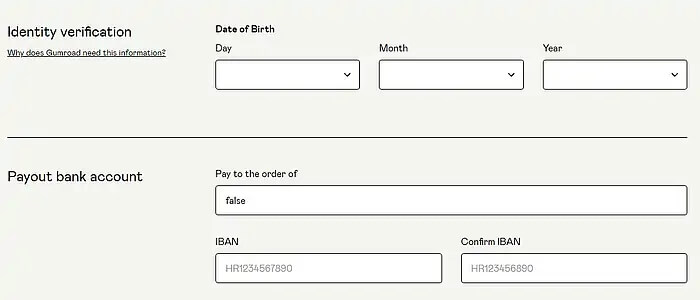
Even if you prefer to use PayPal, the system requires you to fill out basic card billing setup steps initially. Once completed, navigate to the payment integrations section to link the email address associated with your PayPal account.
Advanced Settings & Third-Party Analytics
For advanced digital marketers, tracking data is vital to scaling sales. Gumroad offers robust advanced tracking tools under Settings > Advanced.
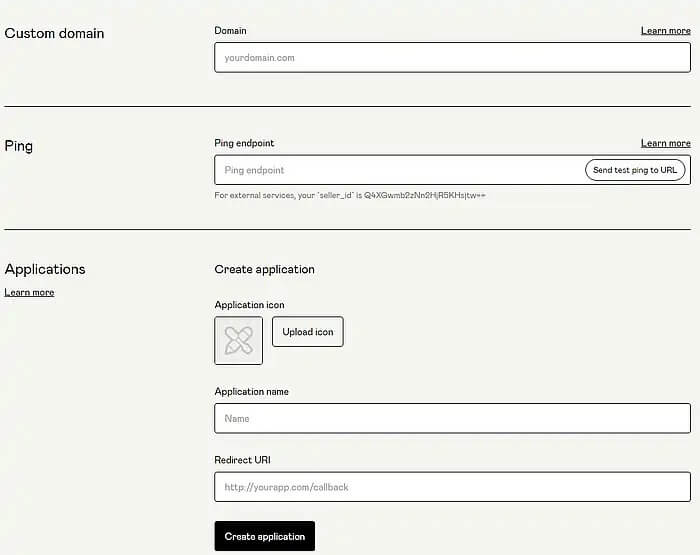
One of the best features for branding is the Custom Domain option.
Instead of using a .gumroad.com subdomain, you can connect a domain you own (e.g., ://yourbrand.com) to make your storefront look fully professional.
Connecting External Analytics
While Gumroad provides native traffic analytics, you can integrate professional software via Settings > Third-party analytics.
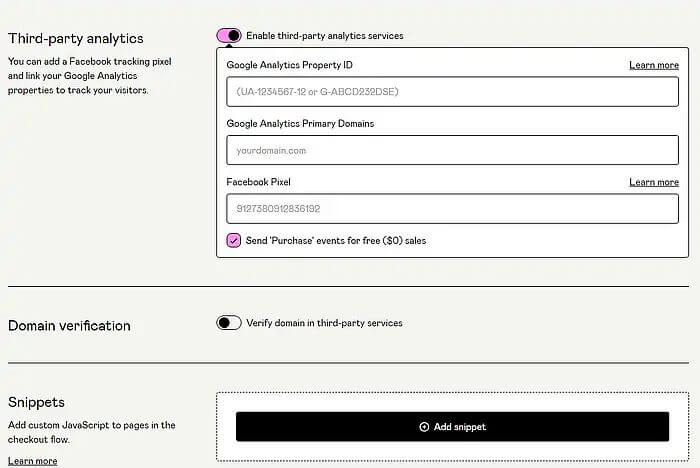
Toggle this option on to enter your Google Analytics 4 (GA4) Property ID. This lets you track where your visitors are coming from and which marketing channels convert best.
You can also inject a Facebook Pixel ID here to track the performance of your paid social media advertisements.
Gumroad Pricing and Fees Explained
When evaluating any platform, understanding the cost is essential. Unlike Shopify or choosing to host your own site, Gumroad does not charge a monthly subscription fee. Instead, they work on a flat transaction fee model.
Currently, Gumroad charges a flat 10% fee on every sale you make. This fee covers platform hosting, digital delivery, and customer service management.
Keep in mind that standard credit card processing fees (Stripe/PayPal processing fees of roughly 2.9% + $0.30) are separate and charged on top of this flat fee.
Frequently Asked Questions (FAQ)

Get the latest news!
Useful tips directly to your inbox – once a week, free of charge.
Conclusion: Is Gumroad Right for You?
If you want to sell digital products without a website, Gumroad remains one of the simplest, quickest, and most reliable tools available today.
It takes away the technical barrier of building a website, offering a built-in checkout experience, audience email tools, and an organic affiliate marketing program where others can promote your products for a commission.
Are you looking to expand your digital empire? Be sure to check out our guides on how to build a store using alternative platforms like Payhip or setting up an organic shop on Etsy.